
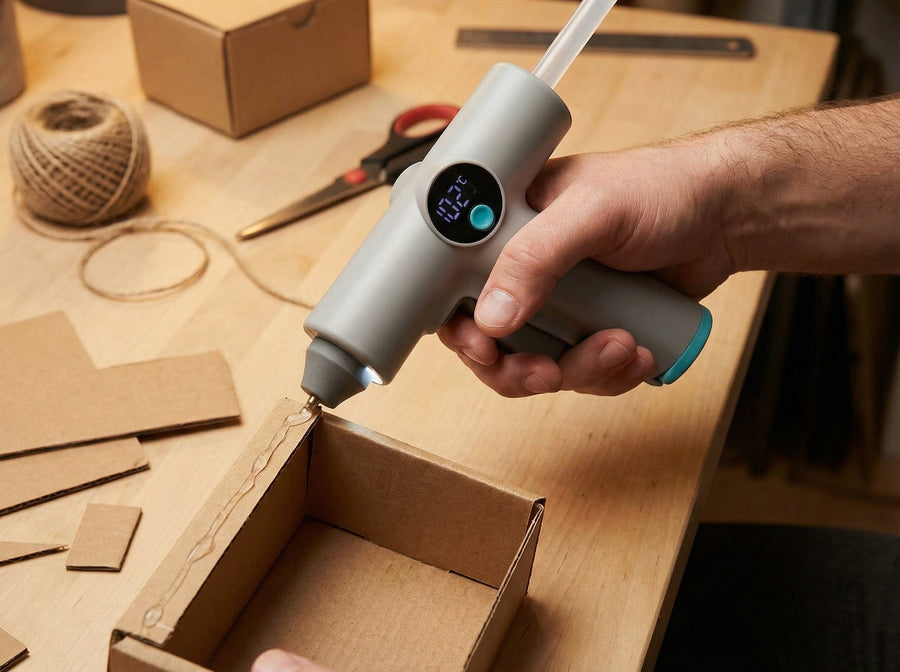
How to Use a Cordless Hot Glue Gun Correctly: A Practical Guide
How to Use a Cordless Hot Glue Gun for Clean, Strong Bonds
Hot glue seems simple: heat the glue stick, squeeze the trigger and attach the parts. Yet small details can make the difference between a neat, secure bond and a joint that comes loose a few days later.
One common mistake is applying more glue when a joint does not hold. Sometimes the real problem is not the amount of adhesive but the surface itself. Dust, grease, unsuitable materials or glue that has already begun to cool can all affect the result.
Learning how to use a cordless hot glue gun correctly means understanding not just how the tool works, but also when to apply the glue, how much to use and how long to leave the joined pieces undisturbed.
1. Prepare the Materials Before Heating the Gun
Before switching on the glue gun, decide exactly where the adhesive needs to go. This may sound obvious, but hot glue begins cooling as soon as it leaves the nozzle. There is not always enough time to reposition several parts or search for another tool once the glue has been applied.
Place the objects in their intended positions without gluing them first. Check that their edges meet properly and that you can reach the bonding area comfortably.
The surfaces should be clean and dry. Dust can interfere with adhesion, while grease or household cleaning residue may prevent the glue from gripping properly. Allow any recently cleaned surfaces to dry completely.
Consider the material, too. Hot glue can work on suitable wood, fabric, cardboard and some plastics, but not every surface bonds reliably. Certain plastics can soften under heat, and smooth materials may provide less grip than expected.
A useful practical detail: if you are attaching a small decorative piece to a frame, check the fit before applying glue. Even a tiny gap can encourage you to use too much adhesive to fill the space. The result may look untidy and still produce a weaker joint than a properly fitted piece.
2. Let the Glue Gun Reach Operating Temperature
Insert a compatible glue stick into the feed opening according to the manufacturer's instructions. For a gun designed for 7 mm glue sticks, use the correct diameter rather than assuming that a similar-looking stick will fit properly.
Place the tool on its designated stand and switch it on according to the instructions supplied with the model.
Some cordless glue guns advertise heating times of around 40 seconds. That figure should be treated as a stated specification, not a guarantee that every glue stick or working condition will produce the same result. If the tool has a temperature display, check it as directed by the manufacturer.
Do not pull the glue stick out forcibly or attempt to remove a partially melted stick unless the instructions specifically allow it.
A cordless design makes it easier to move around a workpiece without managing a power cable. It does not, however, mean the tool can operate indefinitely without charging. If you are preparing a larger project, make sure the battery has sufficient charge before beginning.
3. Apply a Small, Controlled Amount of Glue
Once the gun is ready, position the nozzle close to the intended bonding area without pressing it against the material unnecessarily.
Squeeze the trigger gently and begin with a small amount of glue. Move the nozzle steadily along the joint, keeping the application as even as the shape of the object allows.
It is tempting to apply a thick layer because more glue appears to mean a stronger bond. In practice, this is not a reliable rule. Excess adhesive can squeeze out when the parts are pressed together, create visible strings and make the finished object look untidy.
For example, when attaching a lightweight wooden decoration to a flat backing, a modest bead placed where the surfaces meet may be sufficient. Covering the entire back of the decoration with a thick layer can create unnecessary mess without improving the connection.
The right amount depends on the material, the contact area and the intended use. A joint that must support significant weight should not be made safe simply by adding more hot glue.
If the glue stops flowing smoothly, do not force the trigger. Follow the tool's instructions and allow the feed mechanism to operate as intended.
4. Join the Pieces While the Glue Is Still Workable
After applying the adhesive, bring the surfaces together promptly and position them carefully.
Hot glue begins to cool as soon as it leaves the heated nozzle. If you wait too long before joining the parts, the adhesive may no longer spread and grip as intended.
Apply gentle, even pressure where appropriate. Avoid squeezing so hard that all the glue is pushed out of the joint.
The important distinction is between positioning the pieces and testing the bond. A connection may look secure before the adhesive has cooled sufficiently. Moving the object too early can weaken the joint or shift the parts out of alignment.
Leave the item undisturbed until the glue has cooled and set. The required time depends on the quantity of glue, the materials, the surrounding temperature and the design of the joint.
Do not assume that a surface that feels cool is automatically strong enough for its intended load. If the joint is important, follow the adhesive manufacturer's guidance and test it cautiously only when appropriate.
5. Use the LED Light and Temperature Display for Specific Tasks
Some cordless glue guns include features such as LED illumination and an LCD temperature display. These features can support the working process, but they do not replace careful technique.
An integrated light can help illuminate the area near the nozzle when attaching a small decorative component or working in a partially shaded space. Better visibility can make it easier to place the glue accurately.
The temperature display, when available, provides information about the tool's temperature according to its design. It should not be treated as proof that a particular material is safe to glue or that the resulting bond will be strong.
Material compatibility still matters. A temperature that melts the adhesive may also damage a heat-sensitive plastic or leave a mark on delicate fabric.
If you are working on a material you have not glued before, test a small, inconspicuous area first. This is particularly useful when the appearance of the finished project matters more than speed.
6. Avoid These Common Hot Glue Mistakes
A few habits can make hot-glue projects less predictable.
Applying glue to dirty surfaces
Dust and grease can reduce adhesion. Clean the bonding area using a method suitable for the material, then let it dry completely before applying glue.
Waiting too long before joining the parts
Glue that has already cooled may not spread or grip as intended. Prepare the pieces in advance so you can join them promptly.
Using hot glue on every type of plastic
Different plastics react differently to heat, and some have surfaces that are difficult to bond. Check material compatibility and test first.
Moving the object before the bond has set
A joint can shift even when the pieces initially appear attached. Allow enough cooling time before handling the finished object.
Using hot glue for structural repairs
Hot glue is not a universal substitute for screws, purpose-made adhesives or mechanical fasteners. Avoid relying on it for load-bearing joints, safety-critical repairs or objects exposed to demanding conditions.
Ignoring the hot nozzle
The nozzle and melted adhesive can cause burns. Never touch them to check whether the tool is ready, and do not assume that the nozzle is cool immediately after switching the gun off.
7. What to Do When the Result Is Not Right
If the glue does not hold, resist the urge to cover the joint with another thick layer immediately.
First, consider why the connection failed.
- The pieces separate easily: the materials may be incompatible, the surfaces may be contaminated, or the joint may not have cooled sufficiently.
- Glue squeezes out around the edges: too much adhesive may have been applied, or the pieces may not fit closely enough.
- The glue becomes stringy: the adhesive may be cooling as it leaves the nozzle, or the application technique may need adjustment.
- The material becomes distorted: the surface may be too sensitive to heat for the chosen method.
- The joint fails after repeated movement: the adhesive may not be suitable for a flexible or frequently stressed connection.
For instance, if a decorative plastic piece repeatedly comes loose, adding more glue may only increase the visible mess. Checking the type of plastic and choosing an adhesive designed for that material may be the more effective solution.
Let the tool cool and inspect it according to the manufacturer's instructions if glue flow becomes irregular. Do not insert sharp objects into the nozzle or dismantle the tool unless the manufacturer specifically permits it.
8. Clean and Store the Glue Gun Safely
After finishing the project, switch off the glue gun and follow the manufacturer's instructions for cooling, unplugging or disconnecting the charging system, and storage.
Place the tool on its designated stand while it is hot, and keep it away from children, pets and heat-sensitive materials. Avoid leaving it unattended while switched on.
Do not remove melted glue from the nozzle with your fingers. Clean the tool only as recommended by the manufacturer, since some cleaning methods can damage the nozzle or other components.
Because a cordless glue gun uses a rechargeable battery, follow the supplied charging instructions and use the appropriate charging equipment. Store the tool in a dry, suitable place once it has cooled.
Before starting another project, check that the nozzle and feed area are in suitable condition and that the correct glue sticks are available.
Final Advice
Using a cordless hot glue gun correctly is less about squeezing the trigger and more about preparing the joint, applying the right amount of adhesive and giving it time to cool.
Clean surfaces, compatible materials and accurate positioning usually matter more than applying extra glue. A small amount placed carefully can produce a neater result than a thick layer spread across the entire object.
For crafts, decorations and suitable lightweight repairs, these habits help make the process more controlled and predictable. For structural joints, heat-sensitive materials or applications exposed to moisture and repeated stress, check whether another adhesive or fastening method is more appropriate.
The aim is not simply to make two pieces stick together. It is to create a bond that suits the material and the job.